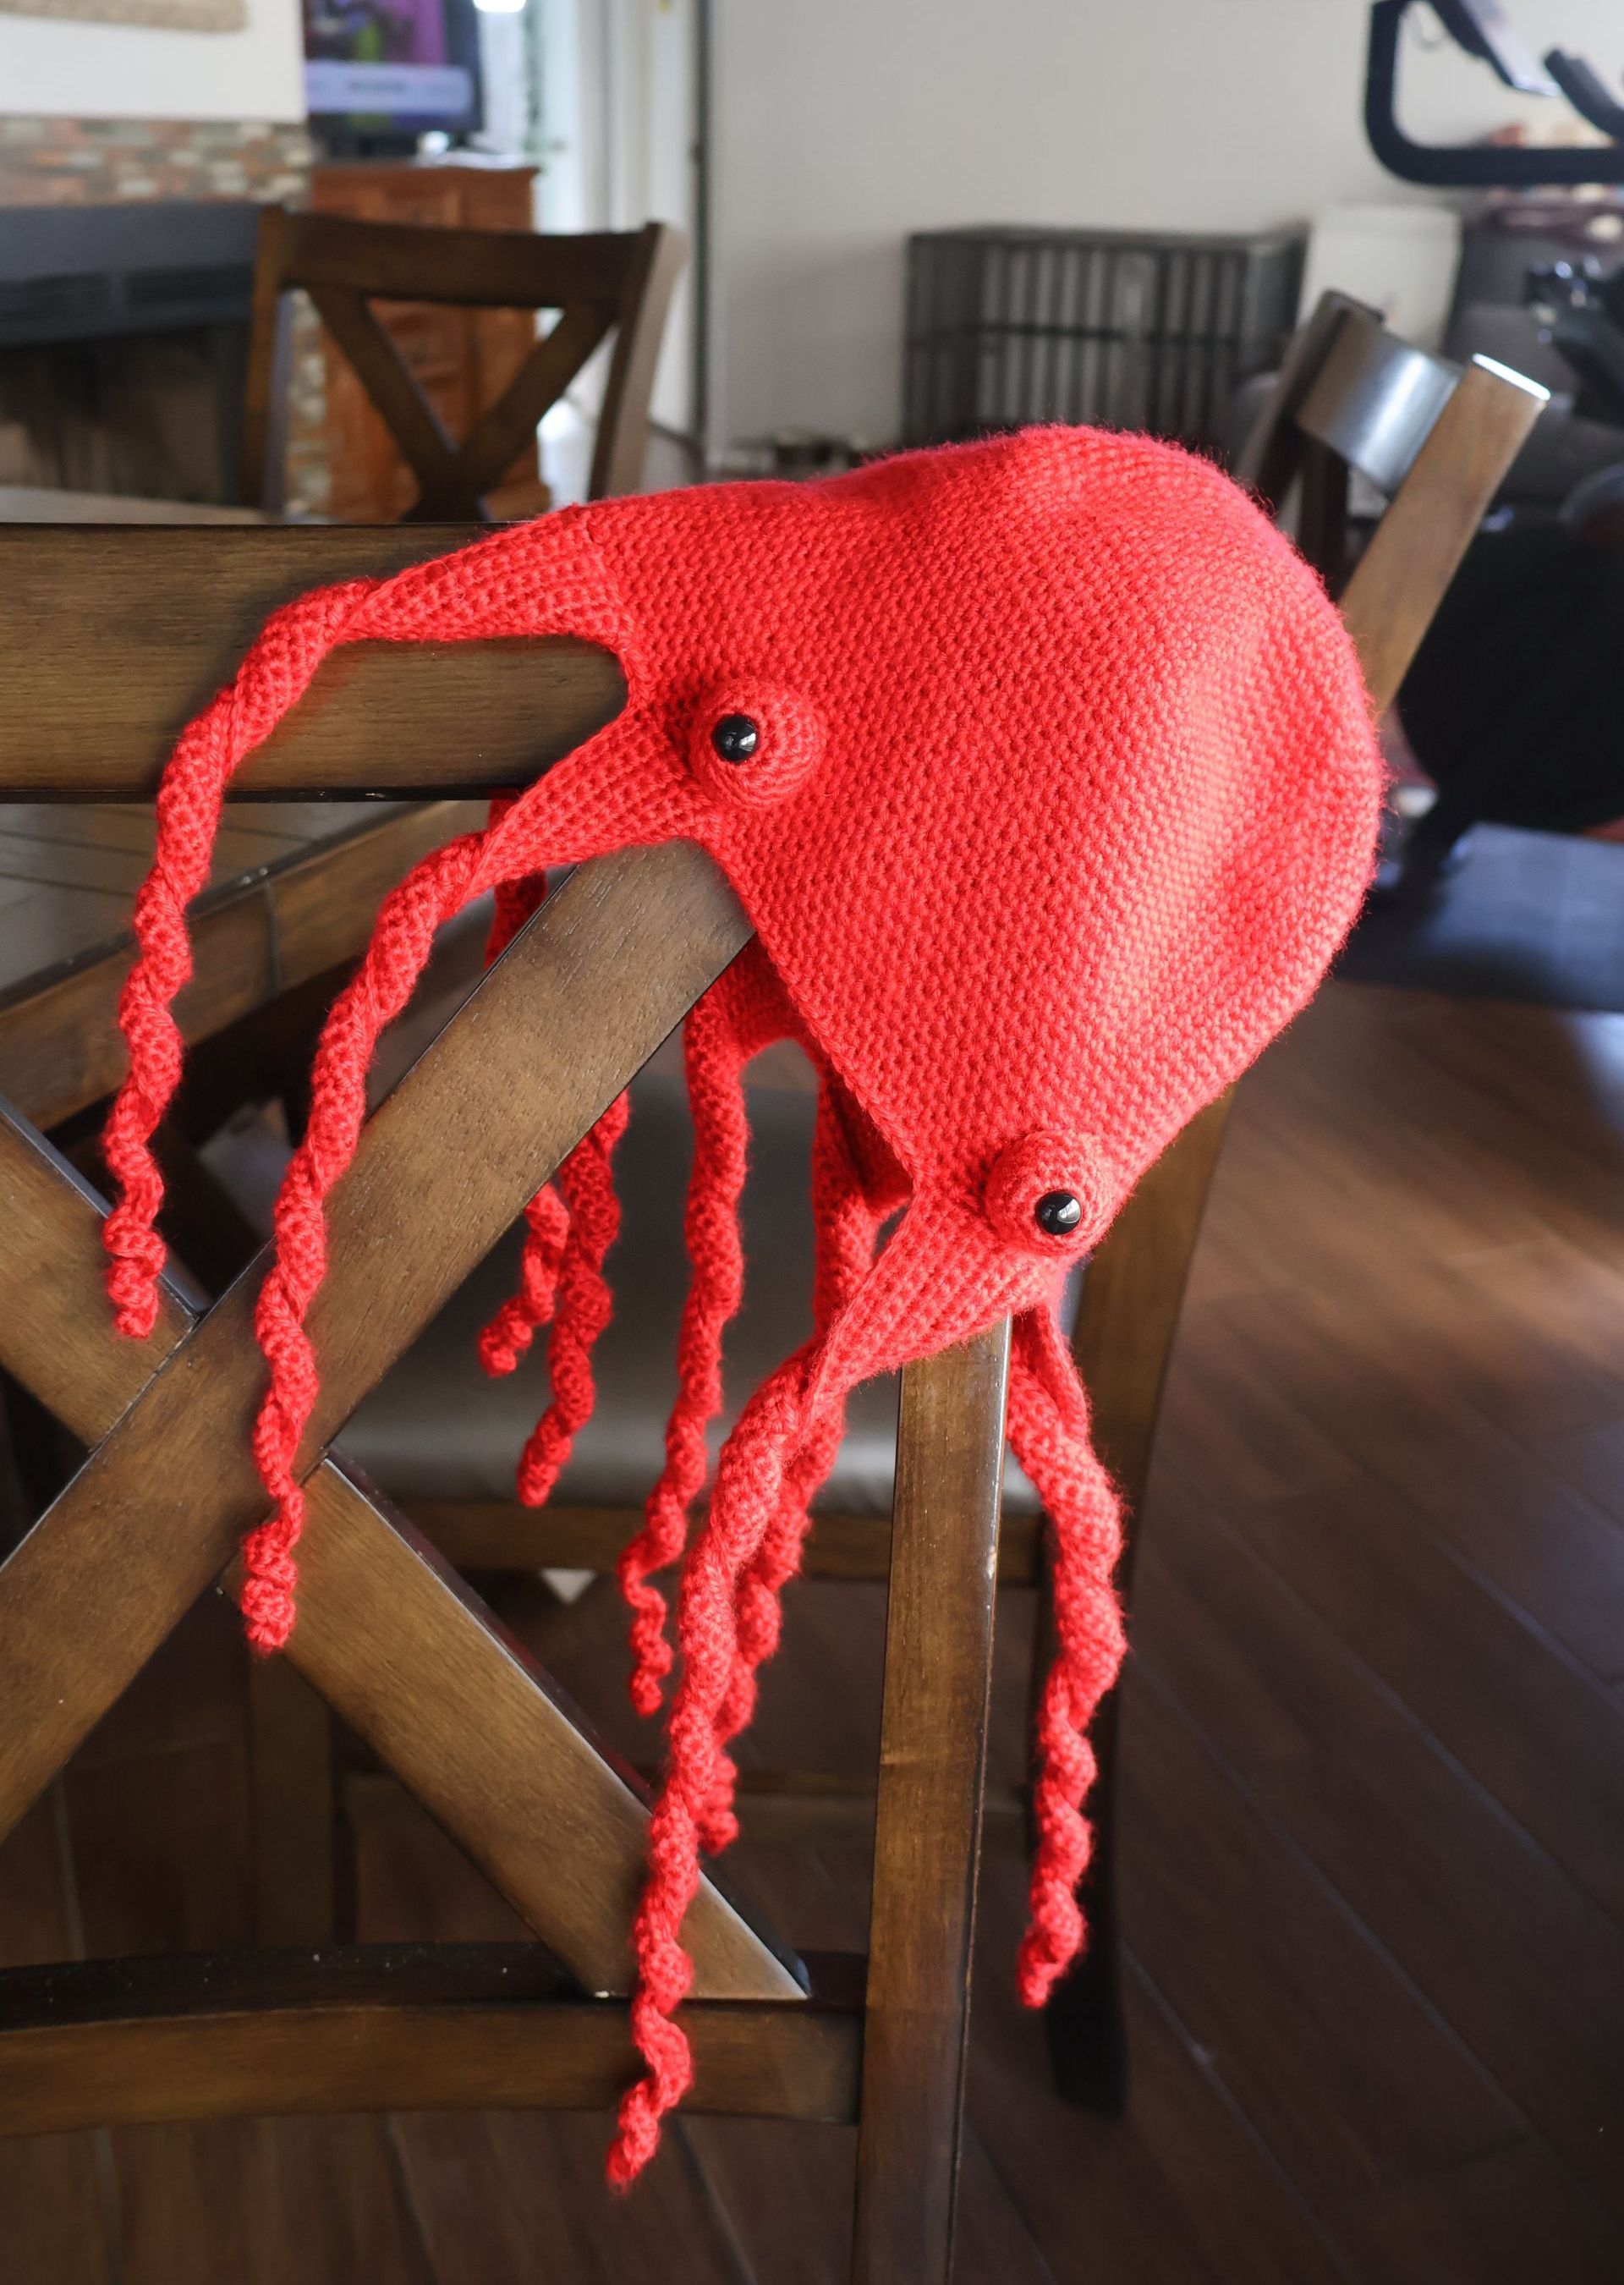
OCTOPUS HAT - no sew! (almost)
Free Crochet Octopus Hat Pattern

Bring a splash of creativity to your crochet with this fun and whimsical Octopus Hat! Designed with a comfortable beanie base and eight playful, curling tentacles, this project is perfect for costume parties, themed events, or simply adding a bit of personality to your cold-weather gear.
At first glance, the pattern might seem it involves a lot of counting—but thanks to strategic stitch marker placement, the tentacle shaping is easy to manage and surprisingly relaxing once you get going. Best of all, the tentacles are worked directly onto the hat—no sewing required—which makes for a seamless, sturdy finish and saves time in the final assembly. The only part that needs to be sewn on is the eyes.
Using basic stitches and simple shaping, this pattern is suitable for confident beginners and experienced crocheters alike. If you're comfortable with single crochet, increases, slip stitches, and chains, you're ready to jump in!
Abbreviations:
MR – Magic Ring
SC – Single Crochet
INC – Increase (2 SC in one stitch)
SLST – Slip Stitch
CH – Chain
ST(S) – Stitch(es)
Gauge: 4" x 4" = 23 single crochets x 23 rows
Skill Level: Confident Beginner
Material:
- Crochet hook size 4mm
- Scissors
- Tapestry needle
- Stitch markers
- Black yarn size 4
-or safety eyes
- Caron Simply Soft Harvest Red size 4
- Tiny bit of fiber fill
Measurements:
The bottom edge of the hat = 20 inches. The top of the hat to the end of the tentacle = 19 inches.
This hat is sized for teen to adult.
Hat:
R1: MR, 6 SC (6)
R2: (INC) *6 (12)
R3: (1 SC, INC) *6 (18)
R4: (2 SC, INC) *6 (24)
R5: (3 SC, INC) *6 (30)
R6: (4 SC, INC) *6 (36)
R7: (5 SC, INC) *6 (42)
R8: (6 SC, INC) *6 (48)
R9: (7 SC, INC) *6 (54)
R10: (8 SC, INC) *6 (60)
R11: 1 SC in each ST (60)
R12: (9 SC, INC) *6 (66)
R13: (10 SC, INC) *6 (72)
R14: 1 SC in each ST (72)
R15:
(11 SC, INC) *6 (78)
R16:
(12 SC, INC) *6 (84)
R17:
1 SC in each ST (84)
R18:
(13 SC, INC) *6 (90)
R19: (14 SC, INC) *6 (96)
R20-R47:
1 SC in each ST (96)
Place a stitch marker in the last stitch.
Do not fasten off. Continue to Tentacles.
Notes about the Tentacles:
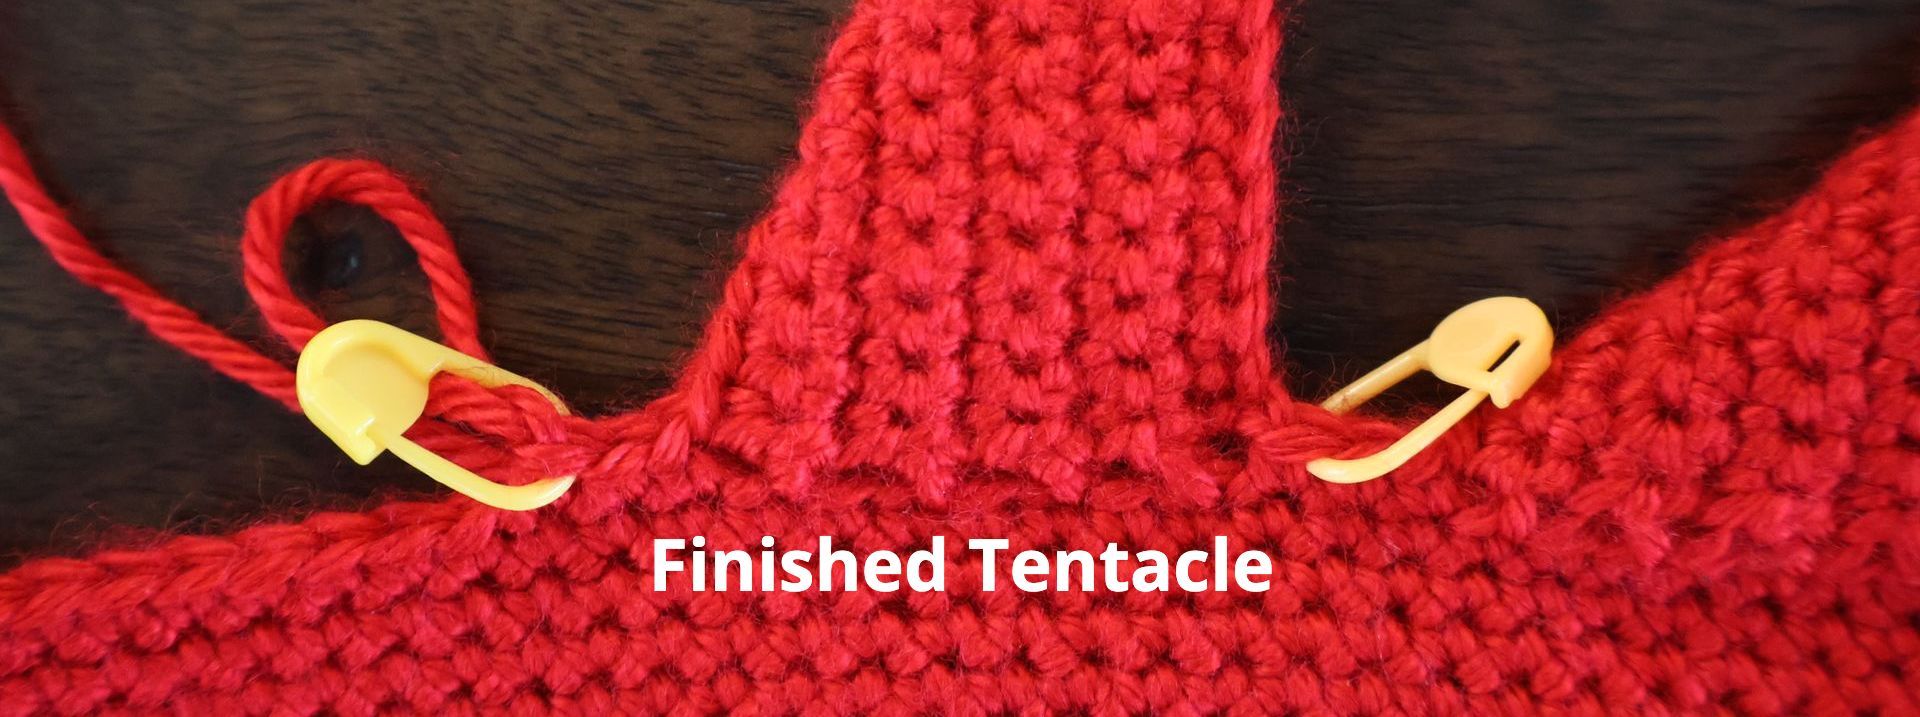
- Each tentacle takes up 7 stitches on the hat. Leave 3 stitches between tentacle bases. Total repeat area per tentacle = 10 stitches.
- SLST into the bottom edge of the hat does not count as a stitch. Be sure to skip the SLST at the beginning of each row.
- Move the stitch markers up a row as you work down the tentacle. When you're done with a tentacle, remove the stitch markers so the can be used in the next tentacle.
Tentacles (8)
CH 70
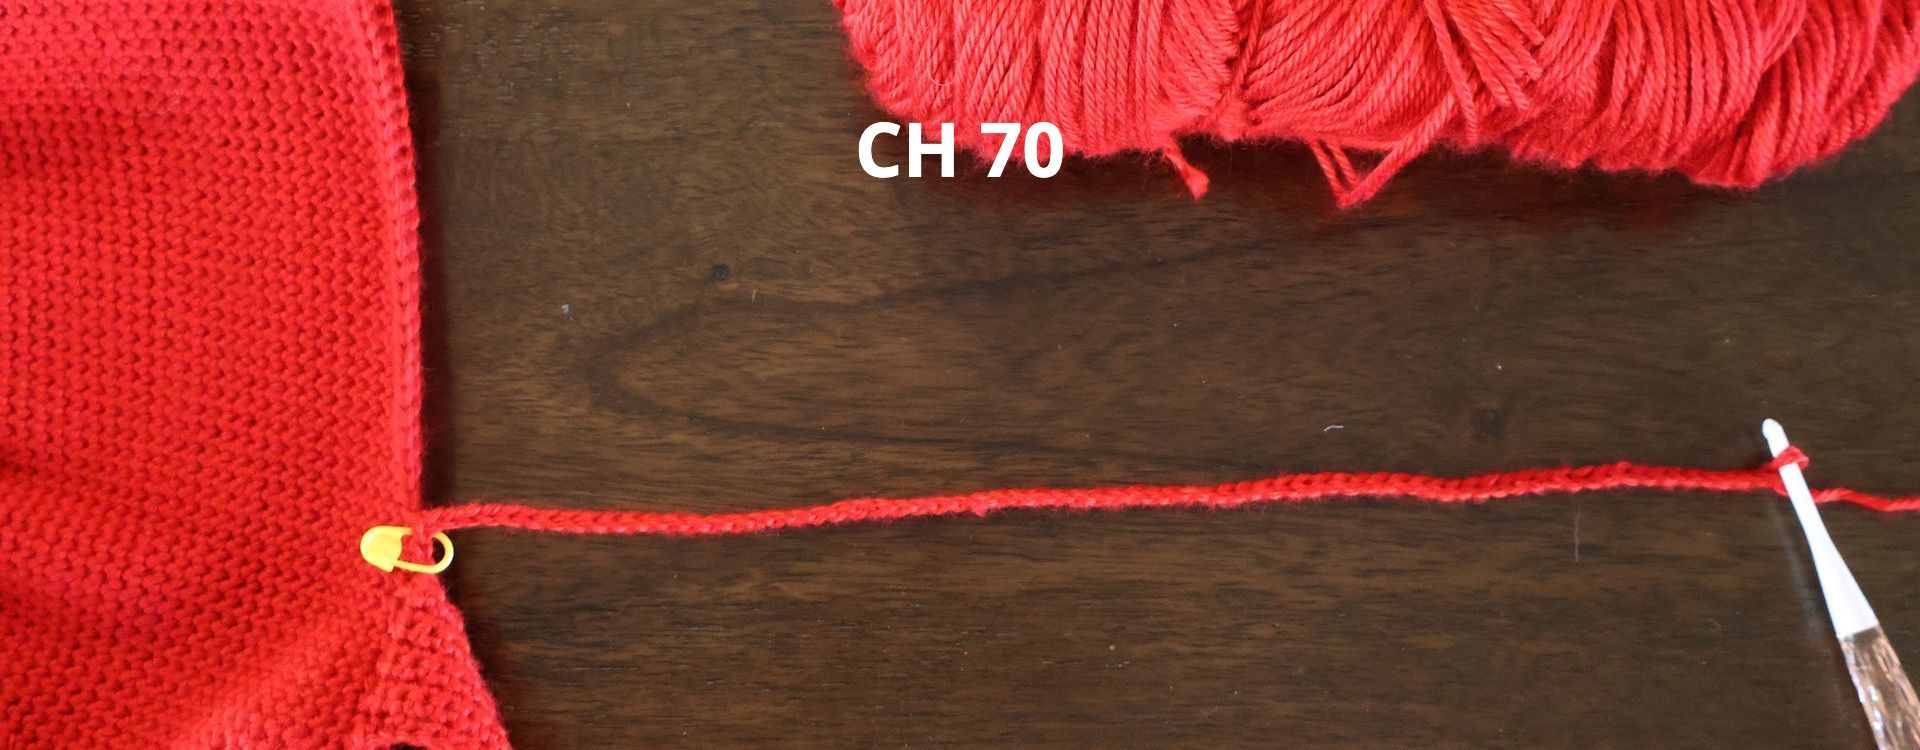
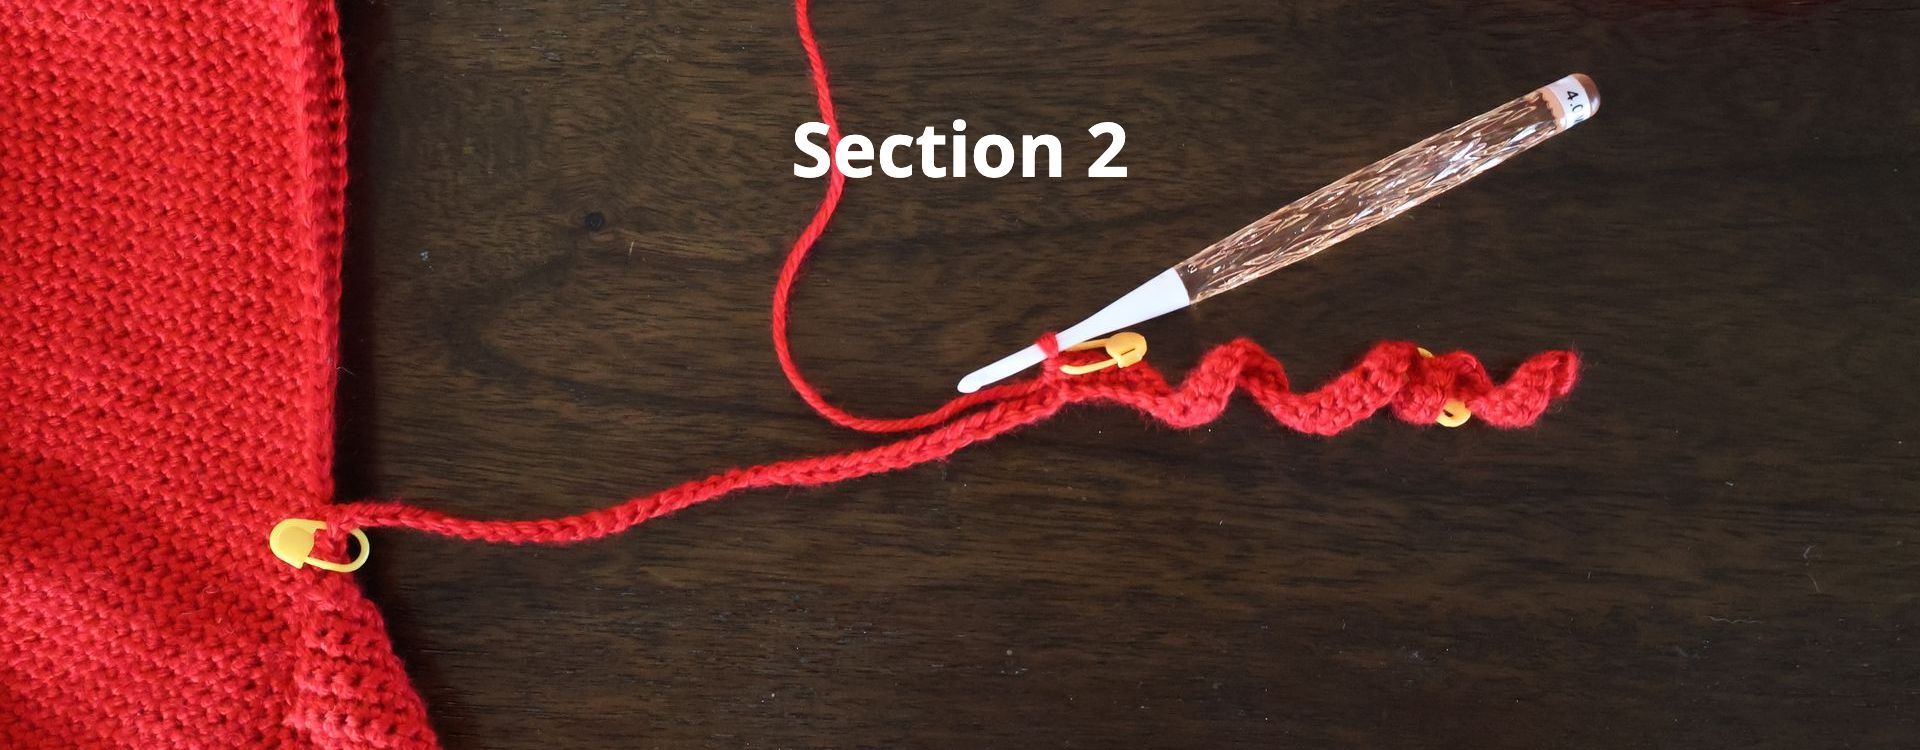
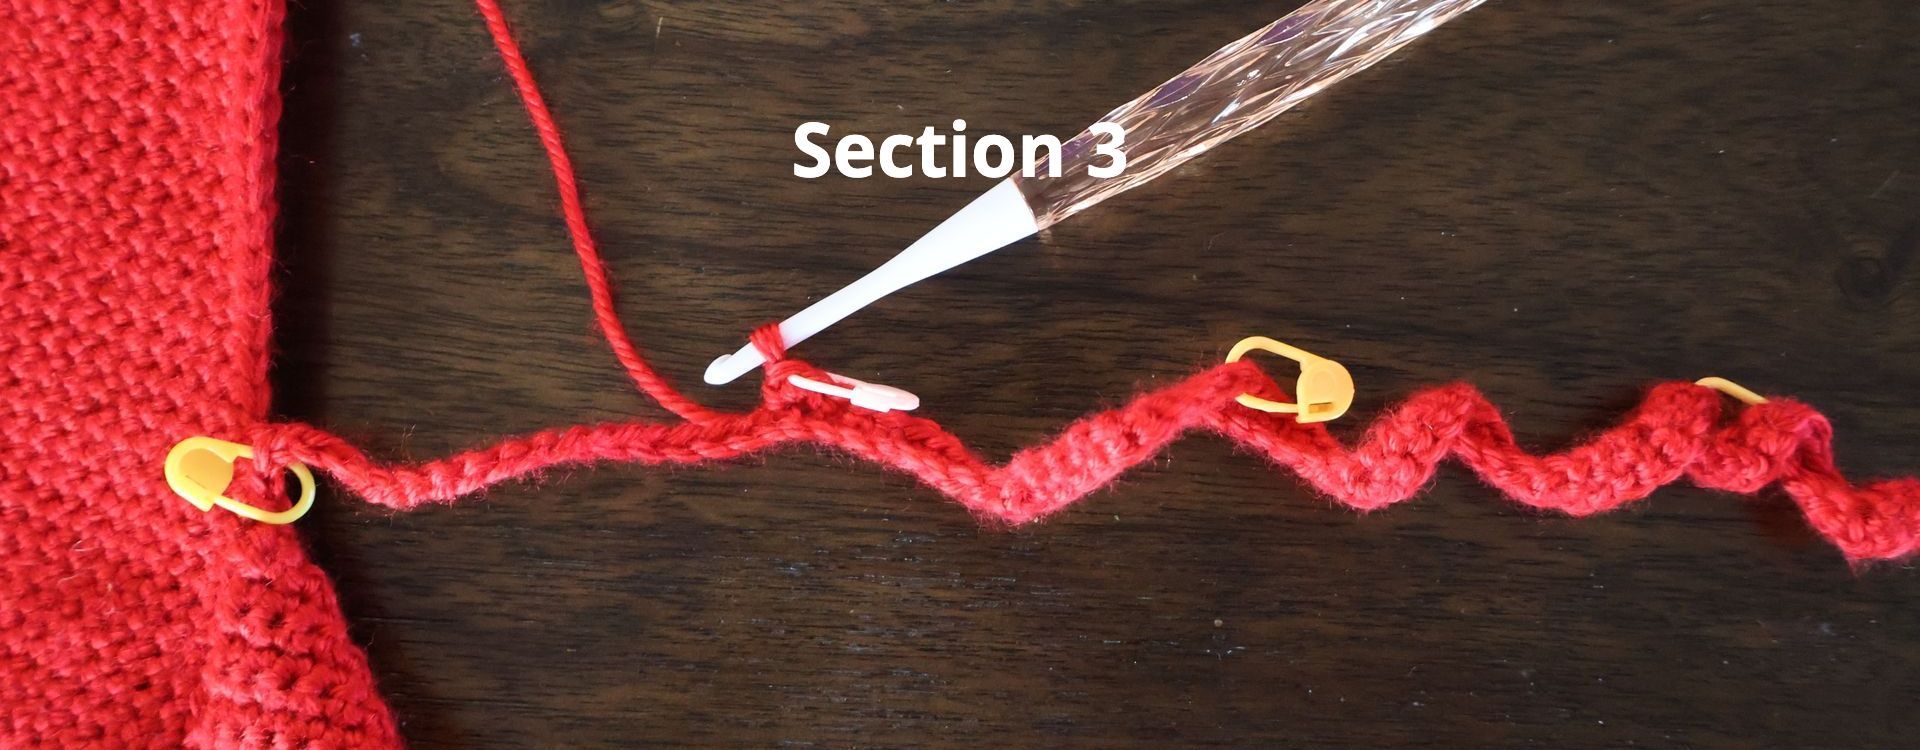
R1: Skip 1 CH, in 2nd CH from the hook:
- Section 1: (1 SC, 1 INC)*7 (21 ) - place a stitch marker in the last stitch of this section.

- Section 2: (2 SC, 1 INC)*7 (28 ) - place a stitch marker in the last stitch of this section.
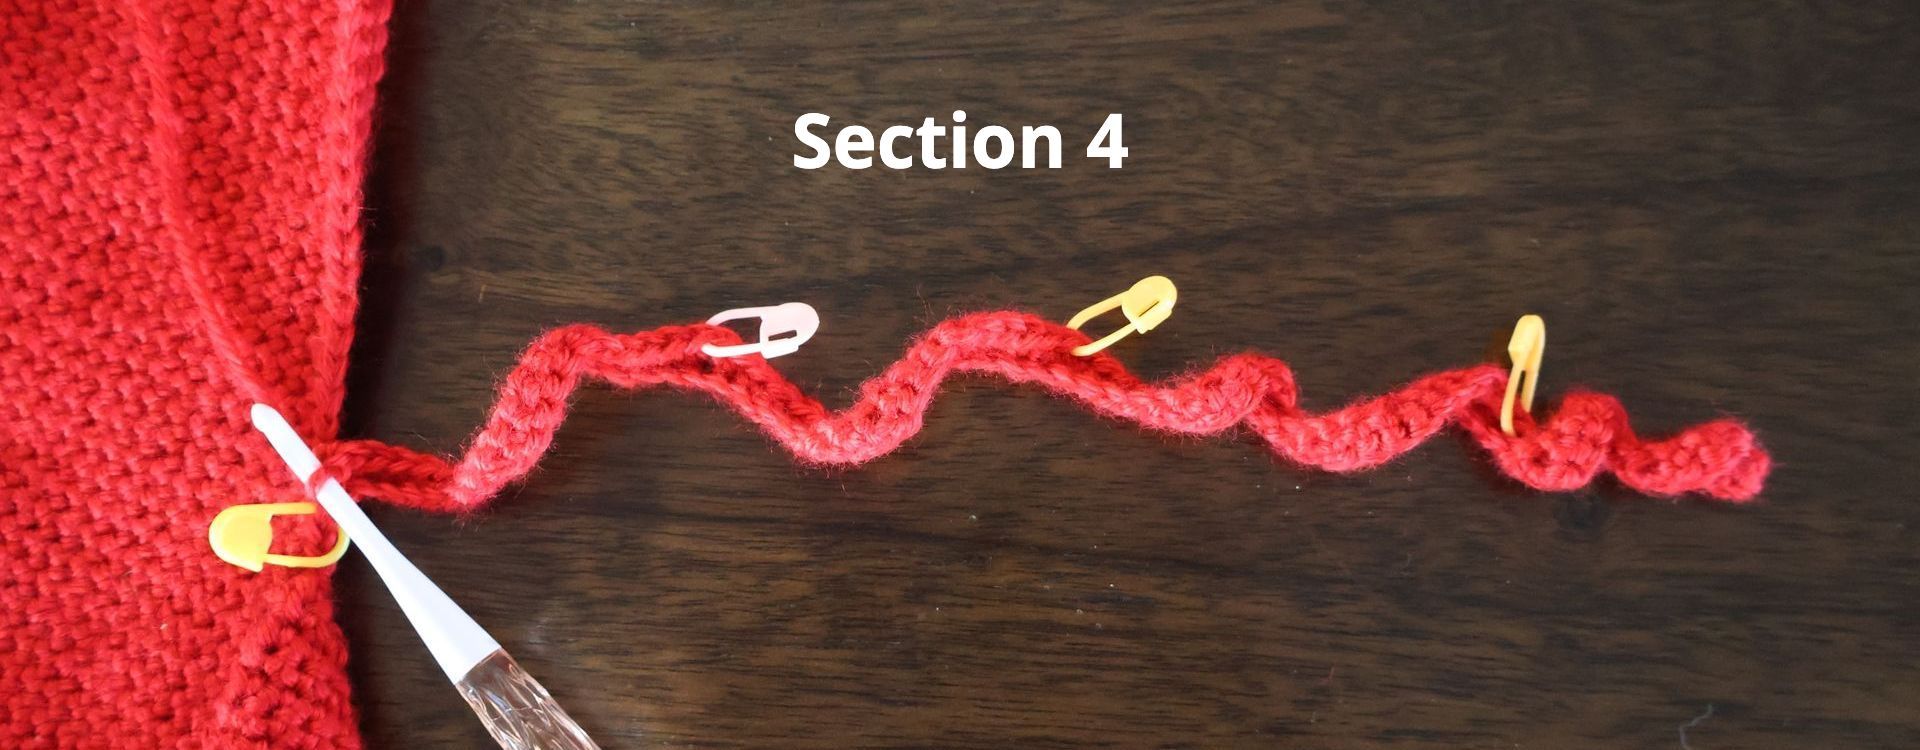
- Section 3: (3 SC, 1 INC)*4 (20 ) - place a stitch marker in the last stitch of this section.
- Section 4: 18 SC (87 stitches total in R1)
1 SLST into the next ST on hat, turn.
R2:
CH 1, 65 SC down the tentacle, 1 SLST into the next ST (this should be the last stitch before the lowest placed stitch marker on the tentacle), turn (66)
R3: Skip SLST, 4 SLST, 61 SC up the tentacle (65),
1 SLST into 2nd ST on hat, turn
R4: CH 1, 37 SC down the tentacle, 1 SLST into the next ST (this should be the last stitch before the middle stitch marker on the tentacle), turn (38)
R5: Skip SLST, 4 SLST, 33 SC up the tentacle (37),
1 SLST into 2nd ST on hat, turn
R6: CH 1, 17 SC down the tentacle, 1 SLST into the next ST (this should be the last stitch before the highest placed stitch marker on the tentacle), turn (18)
R7: Skip SLST, 4 SLST, 13 SC up the tentacle (17),
1 SLST into 2nd ST on hat, turn
R8: CH 1, 12 SC down the tentacle, 1 SLST into the next ST on tentacle, turn (13)
R9: Skip SLST, 4 SLST, 8 SC up the tentacle (12),
3 SC in the next 3 stitches on the bottom of the hat.
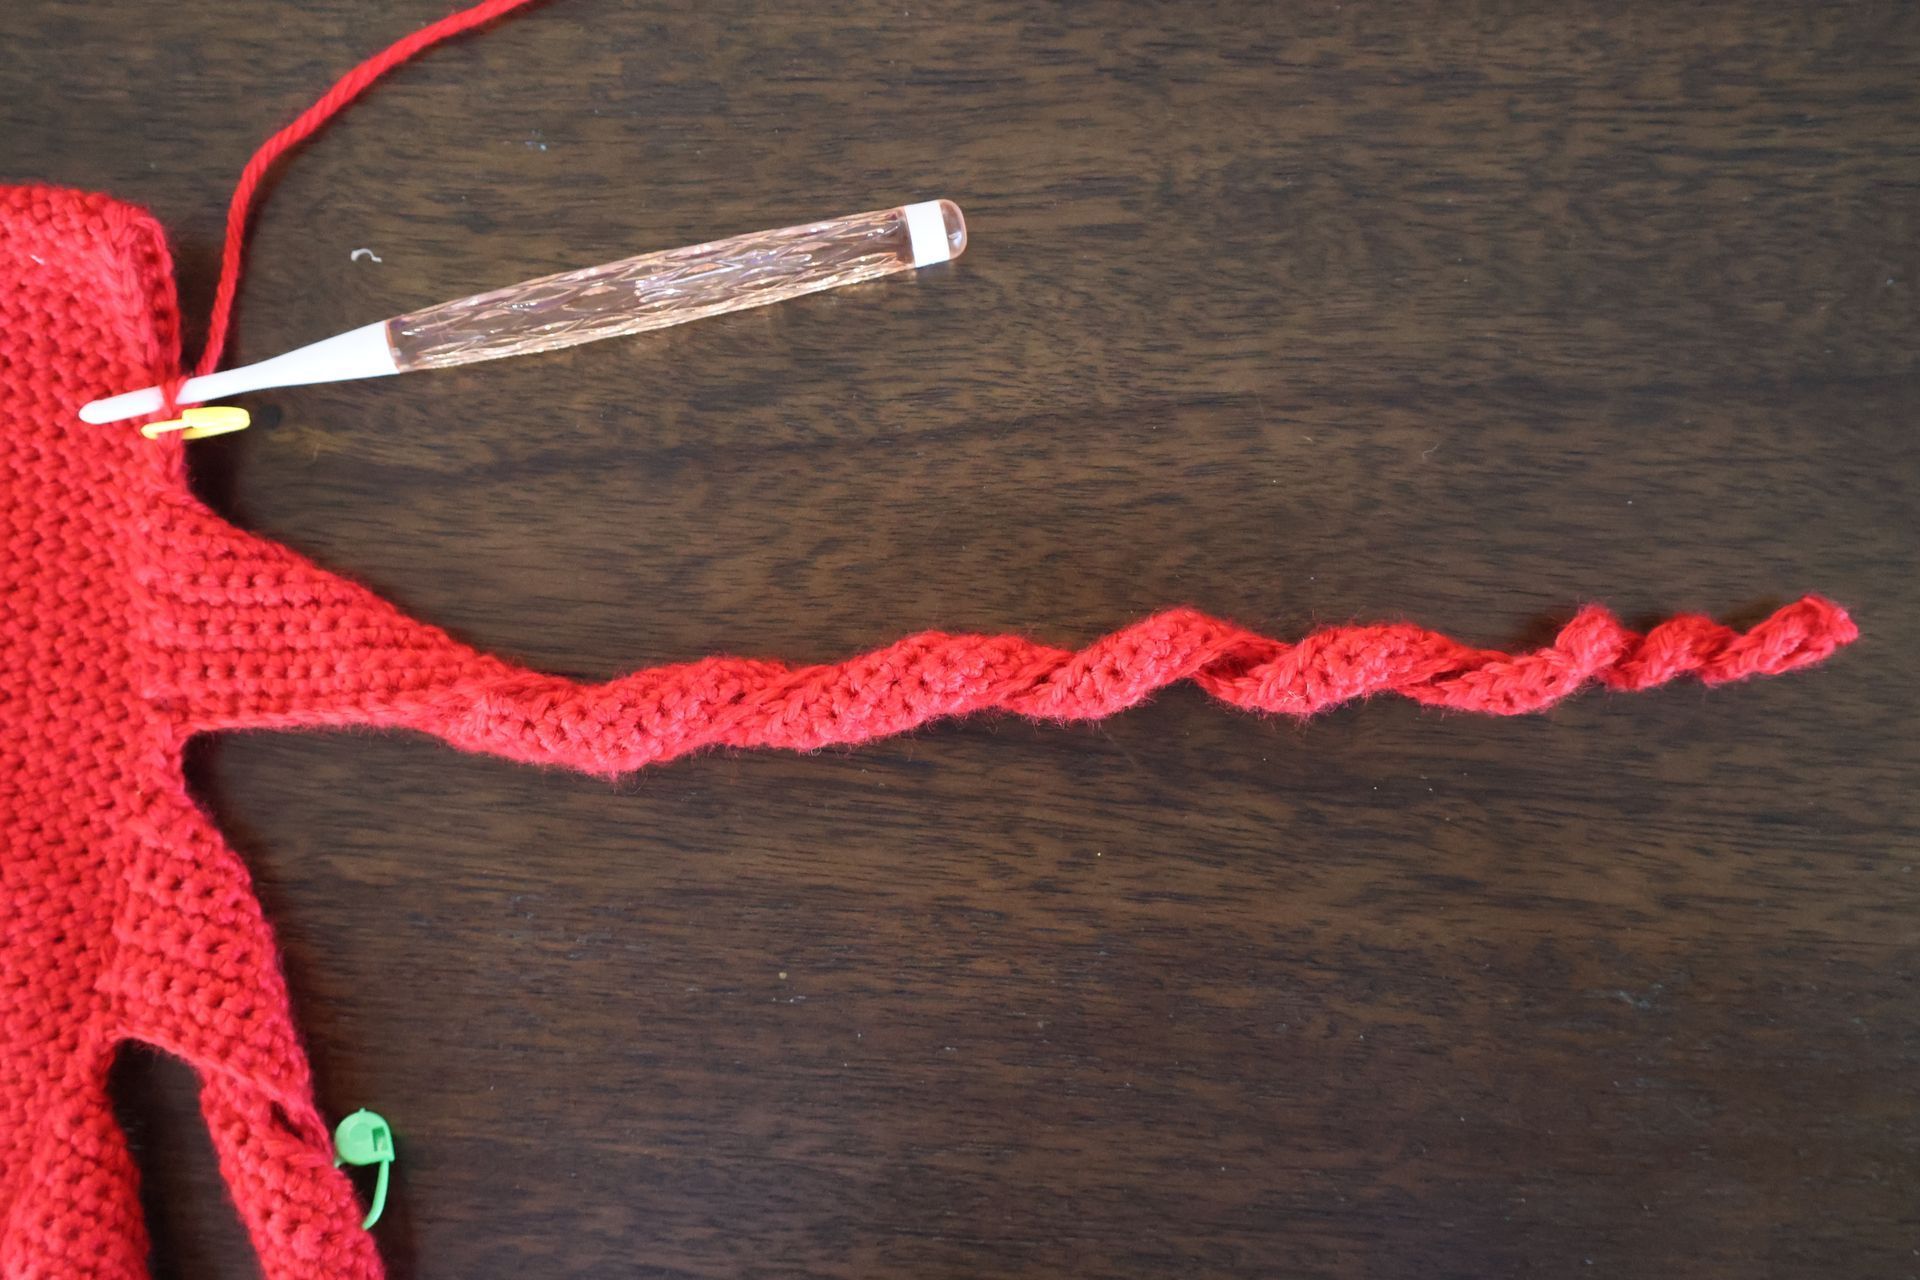
Repeat CH 70 - R9 for a total of 8 tentacles.
Final Step of Tentacle: After completing the 8th tentacle, work 19 SC across the front of the hat to finish off the edge, fasten off yarn, and with your tapestry needle finish with an invisible join and weave in ends.
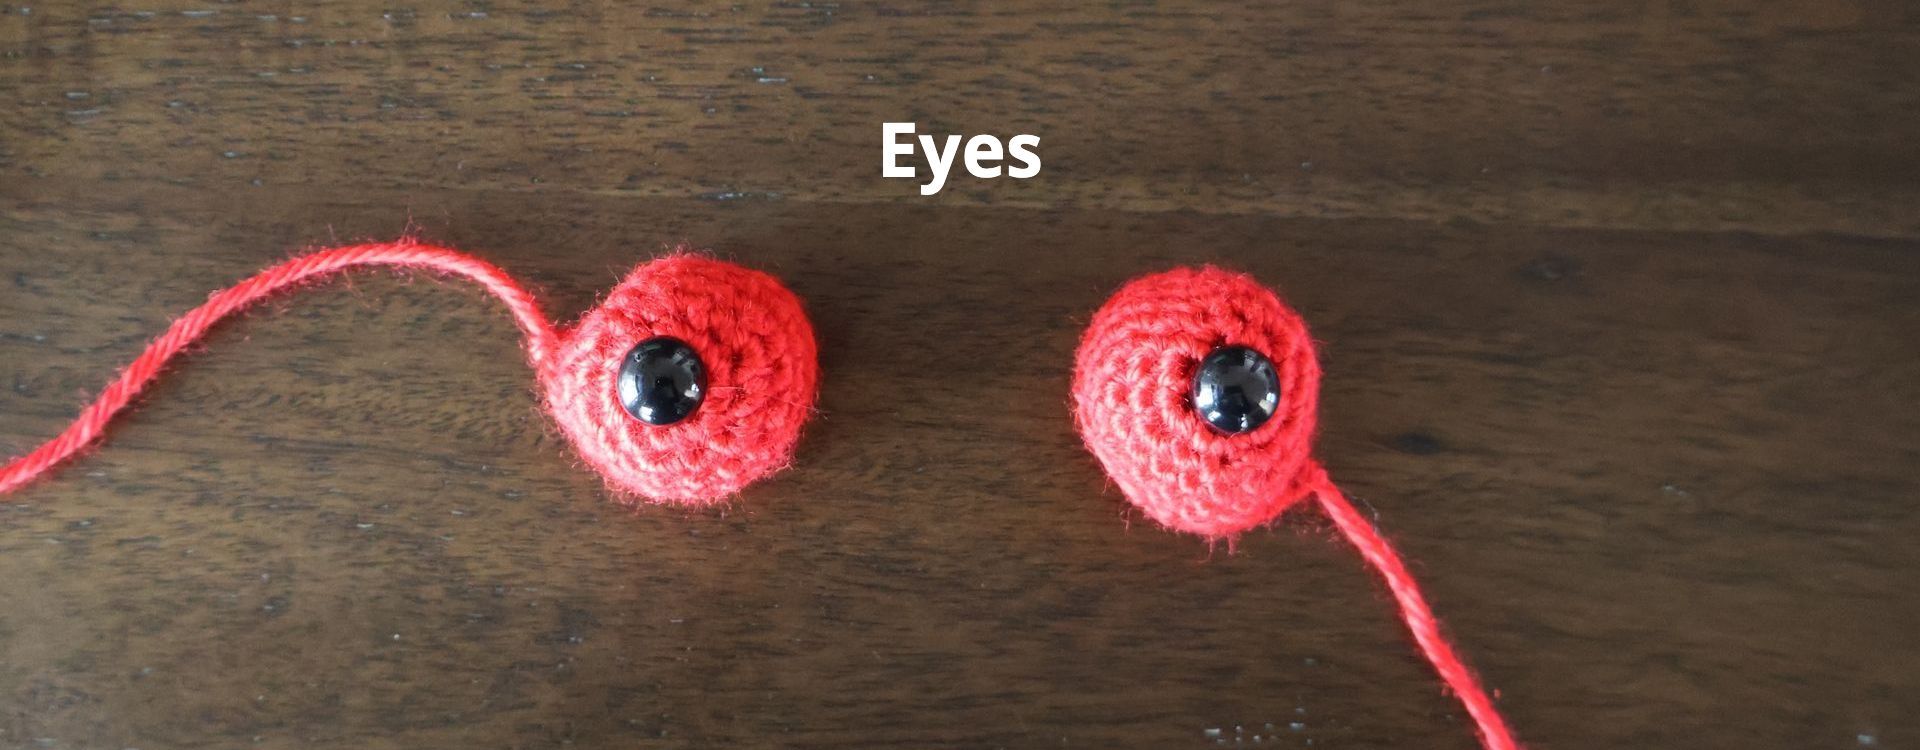
Eyes (2):
R1: MR, 6 SC(6)
R2: (INC,)*6(12)
R3: (1 SC, INC)*6(18)
R4-R7: 1 SC in each ST(18)
Leave a long tail to sew on to the hat and fasten off. Repeat for 2nd eye.
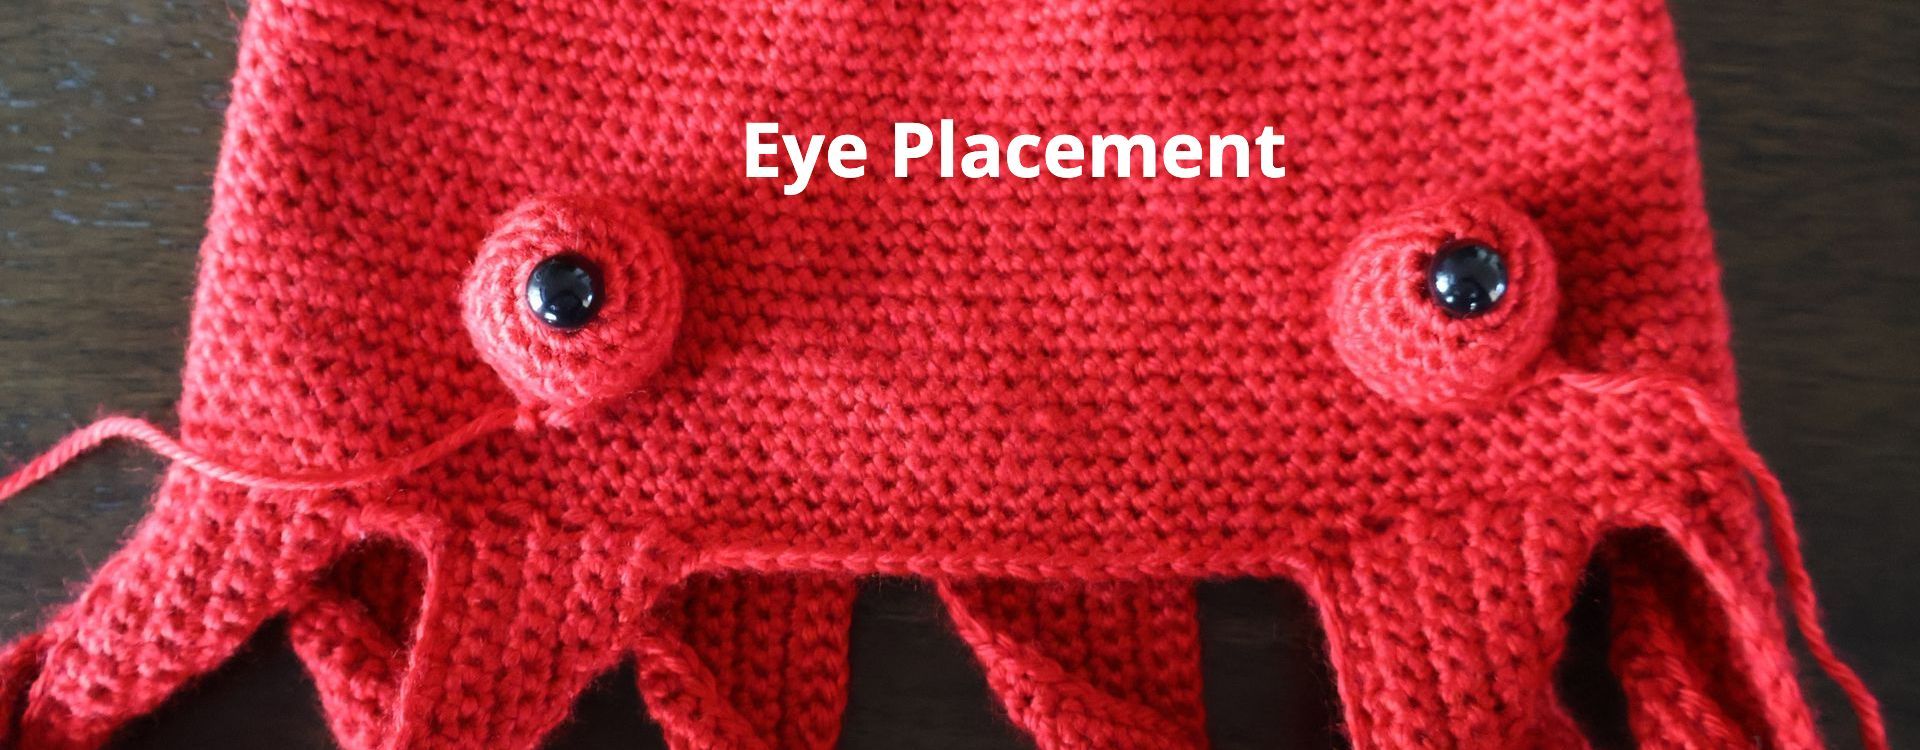
Place safety eyes or sew eyes on with black thread in the center of the magic ring. Stuff each eye with a little fiber fill and sew eyes on to the hat centered with the tentacle to the left and right of the center of the front, and between rows 38-45.
And you are finished! Thank you for using my Octopus Hat pattern! I hope you enjoyed making it as much as I enjoyed designing it.
Happy crocheting!